Showing posts with label gifts. Show all posts

Thursday, May 10, 2012

for my mom

In leiu of giving my traditional hanging flower basket to my mom this year for Mother's Day, I decided to make her some knitting accessories. She is traveling more and more for her job and goes to regular knitting meetups with a group of friends. I thought this gift might be more useful.

knitting bags

The tote pattern I used is "Amanda's Knitting Bag" from The Sometimes Crafter. (I'll be talking more about it during Purse Palooza next month, so stay tuned!) The matching project bag was modified from Jeni's lined drawstring bag tutorial. I essentially added a canvas bottom, interfaced the outer fabrics, and changed the dimensions up a bit.

By the way, that brown yarn prop up there is a scarf I started making when I was about 8 months pregnant with Cooper. I think I'm going to give up knitting as a hobby.

Are you making things for Mother's Day this year?

Saturday, February 11, 2012

Saturday Sewing

birthday bunny

Claire is going to a birthday party tonight, and decided this morning that she wanted me to sew her friend a bunny like the ones I made the kids for Easter. I couldn't resist her desire to give a handmade gift, so I put my other plans aside and started sewing.

The pattern is by Hop, Skip, Jump. I didn't have flannel, and Claire rejected regular cotton and linen because it wasn't soft enough. We found a piece of minky, and while I didn't think it would work, we gave it a try. Slippery stuff to sew up, but it's forgiving enough that any wonkiness doesn't really show. Phew. Claire even helped me stuff the legs and arms-- my least favorite part.

Yay for handmade gifts! And for getting to skip our trip to Target.

Sunday, October 30, 2011

Bloggers' Quilt Festival Fall 2011-- a wedding quilt

It's that time of year! Amy at Amy's Creative Side is hosting the Bloggers' Quilt Festival.

Amy'sCreativeSide

And I've got something new!

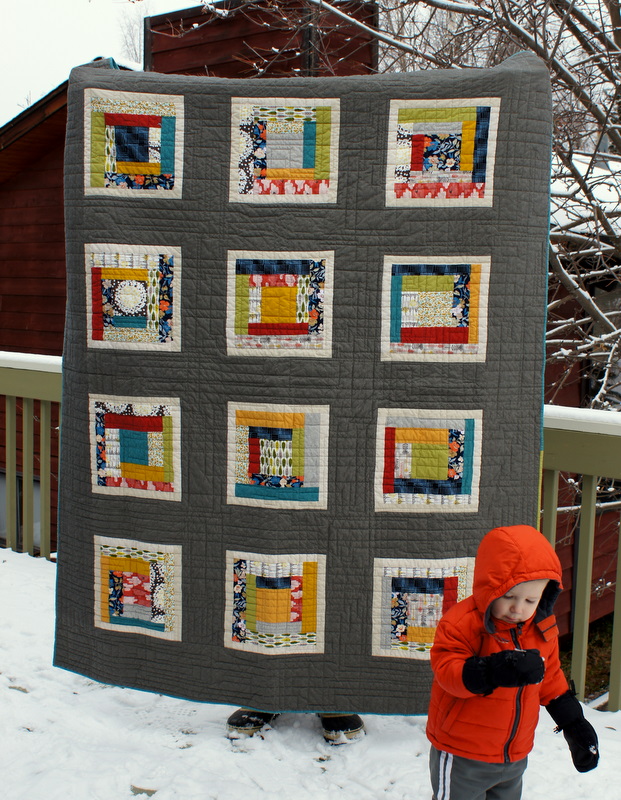
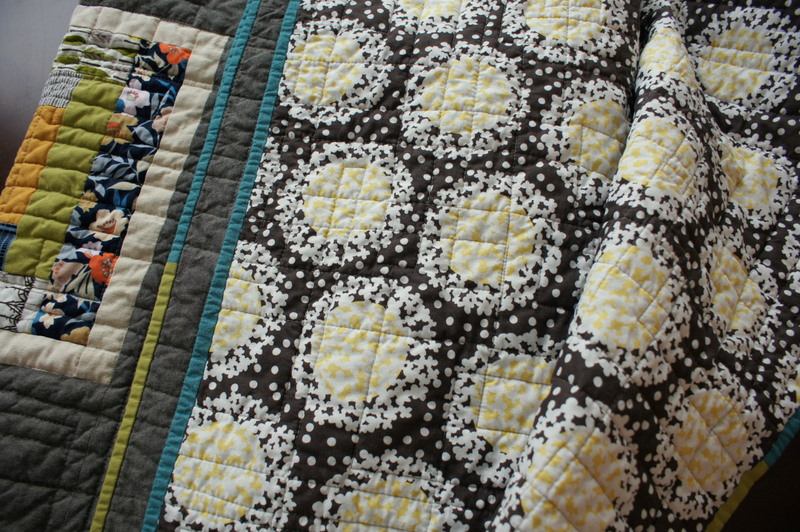
PJ and Danielle's quilt


I made this quilt as a gift for my brother-in-law, PJ, and his wife Danielle. They married this summer in a beautiful outdoor ceremony.

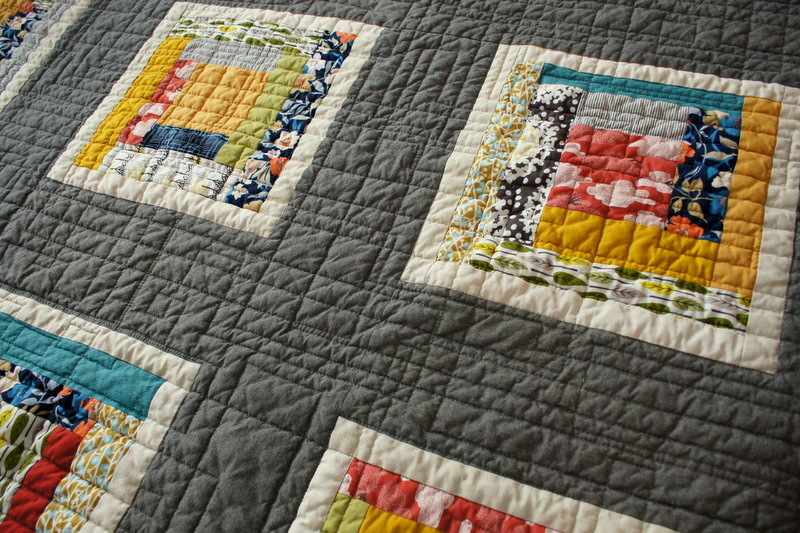
The blocks are simple log cabins, sashed in a thin border of Essex linen blend. The fabrics include quite a few solids, Cloud 9 organics, and a few others. The grey sashing is Carolina Chambray in Ebony.

PJ and Danielle's quilt


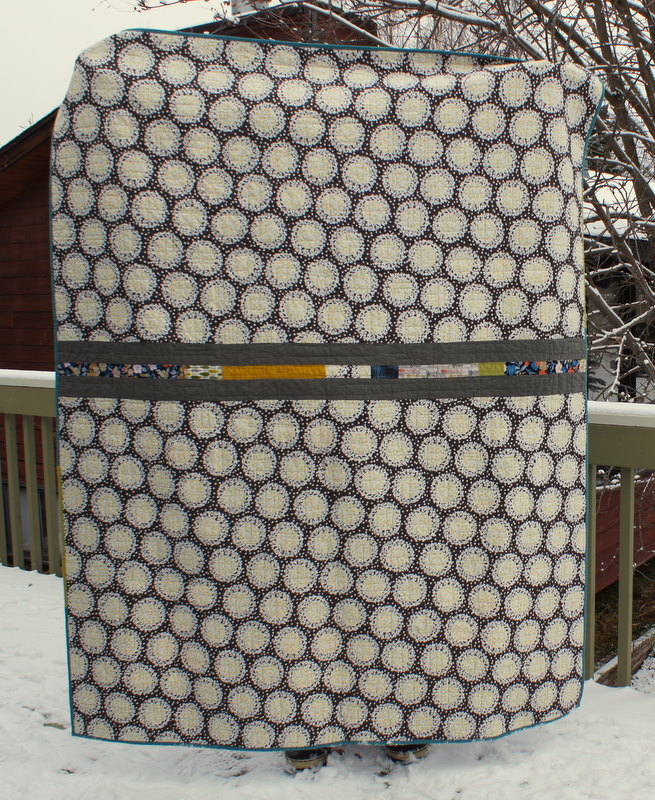
It's backed in one of my favorite Cloud 9 fabrics, Hydrangea. It washed up so beautifully! It's incredibly soft.

PJ and Danielle's quilt- the back


This is the first time I've had someone else do my quilting-- the quilt measures 62" x 78", and I wasn't sure I wanted to do it on my own machine. So I sent it off to my friend Krista Withers, who many of you know on flickr as lolablueocean. (Seriously, go to her photostream after reading this. You will be so glad you did!)She's a professional long arm quilter in Seattle and does amazing work, both personally and for others. This quilt is no exception! I pretty much gave her free reign to do something simple and modern. I love the boxy look she chose. She also chose a poly down batting that makes the quilt so lightweight and fluffy.
PJ and Danielle's quilt


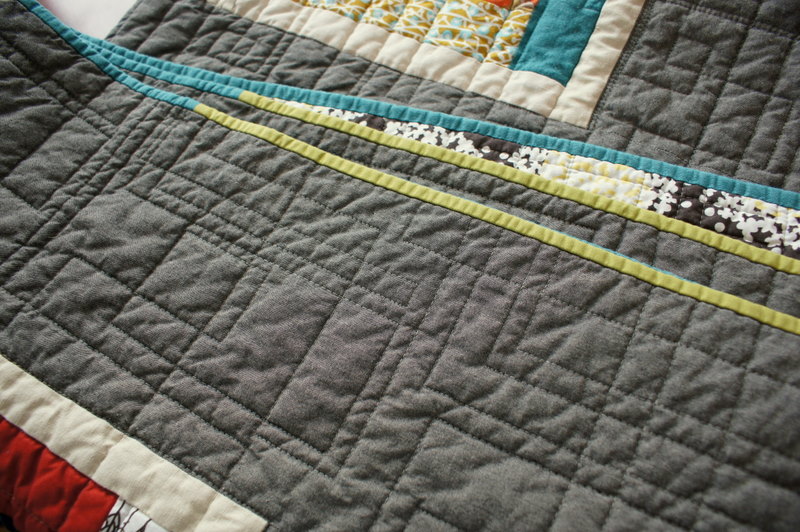
In order to keep the colors from being too "autumn," I decided to bind the quilt using a teal crossweave with a couple of shots of olive green.

PJ and Danielle's quilt


This quilt is being gifted tonight. I'll admit that I'm always a little nervous giving a handmade gift. I hope this quilt will be used-- it was designed to be backyard, dog, and (hopefully someday) baby friendly!

Make sure to check out the other quilts in the Festival! Now back out to the snow...

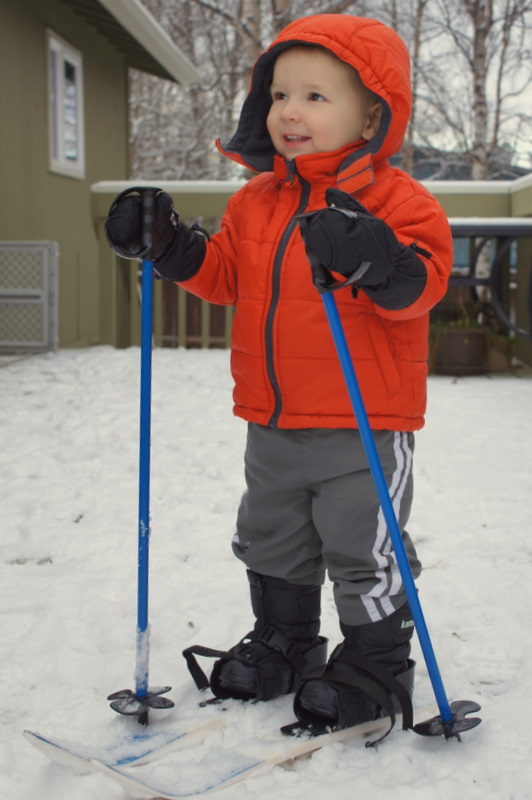
yay for toddler skis!

Wednesday, May 18, 2011

teacher thank you gifts

It's the last day of school! When Avery started kindergarten, our district implemented a new calendar that runs from mid-August to mid-May. It still amazes me how quickly the end of the year creeps up!


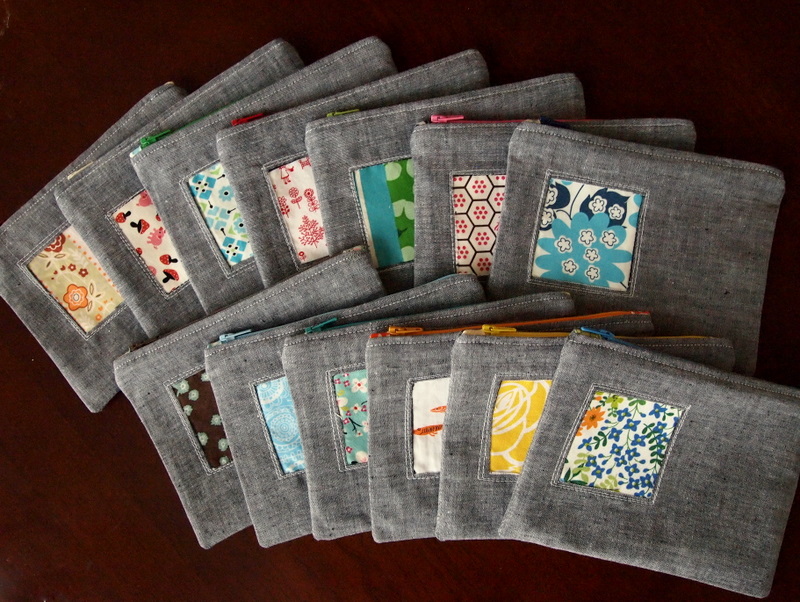
Avery and Claire go to one of the coolest schools in town (in my opinion) and are surrounded by incredible teachers and staff. I had originally planned to do gifts just for their four homeroom teachers, but then the list grew to include everyone from gym teachers to the school secretaries. I needed to find a way to keep costs down. Enter the zip pouch!


I made 13 pouches, all of the same simple design. They are made out of what I thought was a grey crossweave (in reality it's more blue) and a single patterned fabric for the reverse applique window and lining. Everything came from my stash, including the interfacing and zippers. They sewed up quickly once I got an assembly line going. 


Avery and Claire put each one together. Inside the pouches are some yummy chocolates, a handwritten note from the girls and me, and a $5 Starbucks card for the homeroom teachers. The two male teachers in the school get a Starbucks card and chocolate instead of the pouch. I attached a tag to the zipper pull that has each teacher's name so that the girls can easily tell which one is which.


I'll admit that this is not normal for me-- usually I have grand plans to make things but then run out of time and end up doing a last minute dash to the store for gift cards. I'm happy to have had the chance to do something more personal. On to summer!

Monday, December 20, 2010

crafty commissions

This post could also be titled "When Craft and Bad Photography Collide." Please pretend that it wasn't dark or snowy when I took these photos. Or that I didn't bother to clean off my counters or move the Amazon box that is holding my Christmas present from Rob.

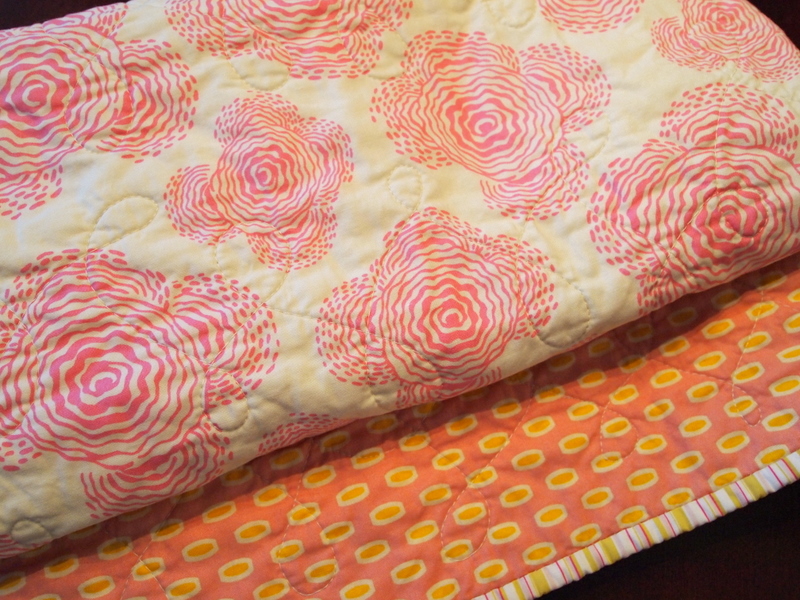
I received some sewing requests from friends and family over the last few weeks. First up, the baby quilt that my mom will be gifting to one of her employees, who is due with her first baby girl any day now.


I used fabrics that I've had sitting in my stash forever, and probably the only pastel ones I own. They're a mix of Amy Butler, Erin McMorris, and a Heather Ross stripe.


The back is pieced with more Amy Butler and some Heather Bailey Pop Garden. I quilted it with some simple loops. I will admit that while I was sewing this, I felt the teeniest little twinge of desire to have another baby. Don't tell Rob.


Next, an apron for my friend Anna's dad. When he retired, he picked up an interest in baking blueberry pies. She requested something masculine, but also thought it would be fun to use some blueberry fabric. I used a great ticking stripe fabric for the main apron and lined the pocket with the blueberries. I didn't use a pattern, but loosely traced an apron that I already have. Surprisingly, this sewed up super fast!


And just last night I finished up a pair of art bags for my friend Kate, who will be filling them up with supplies and giving them to her niece and daughter for Christmas. The original plan was to sew zippers into the top of the totes, but that did not work so well. So I kept them open and made matching zip pouches to hold things like colored pencils and markers.

It's going to be a busy week with Christmas parties, skiing, and a big first birthday tomorrow! I'll check back in, but in the meantime, I hope you all have a fantastic next few days!

Tuesday, December 14, 2010

Echino project tote


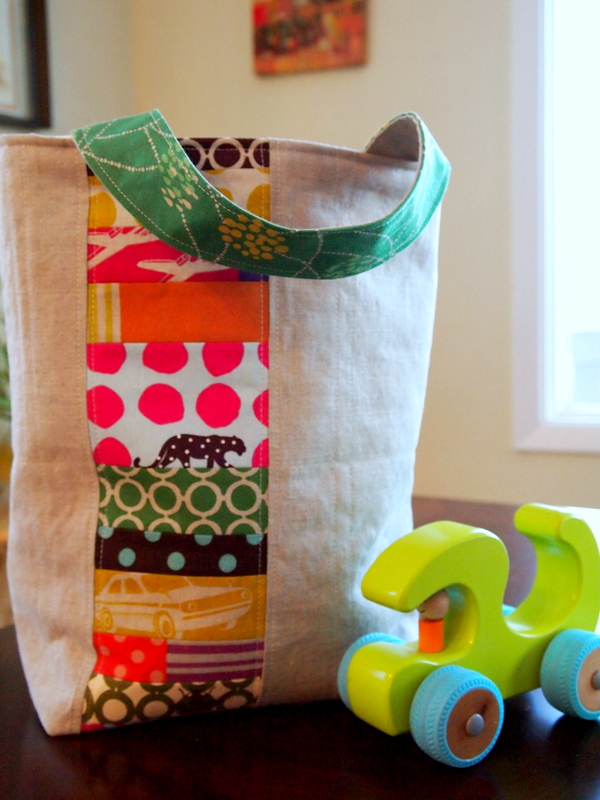
I whipped up this tote as a Christmas gift for my sister-in-law Jamie this morning. I modeled it after the tote I had made for her birthday in May but kept for myself. At the time, I thought it was too substantial. But since then I've learned that it's really the perfect bag for toting around books and knitting projects. Jamie crochets and reads voraciously, so I think this will be put to great use.


It's made of linen and some Echino scraps. I interfaced it with fusible fleece, which makes it sturdy and able to stand up on its own. It's lining is a great Japanese hedgehog fabric that I've had in my stash forever. I sewed in a simple divided pocket, lined with an orange and white paisley that's a fun surprise against the green.

Check another gift off the list!

Saturday, December 11, 2010

a zippy to be filled with pre-teen goodness

Cooper's fever was a result of some unknown virus, not teething like we thought. Luckily it passed after a few days and our sweet, happy baby is almost back to full speed!


Any sort of productivity slowed down considerably, leaving me with a messy house and nothing new on the sewing front. But during this morning's nap I was able to put together this quick pouch for my niece. It's going to be filled with a gift card to Claire's and lots of supplies for making friendship bracelets.

Friday, December 3, 2010

handmade gifts- day 4

Today is the day of the zippy. Zippered bags, pouches, whatever you want to call them can be customized for anyone-- picky preteens, conservative grandmothers, etc.

I made a vinyl zippy (using the instructions from the oh-so-awesome Denyse Schmidt Quilts):


And a denim quilted zippy:


I've been trying to use up some home decor fabric too, and they work great because I don't have to use interfacing!


There are dozens of great tutorials on making zippered pouches out there. When I made my first zippered pouch, I used this tutorial. My secret for avoiding broken needles and a lot of frustration is to allow plenty of extra fabric on either side of my zipper opening. So for my 7" zippers and quilting weight fabric (with a lightweight interfacing fused on), I'll cut my fabric to be 8" wide and do a 1/4" seam allowance. When I do a pouch that has fusible fleece or batting as the interfacing, I cut the pieces to be 8.5" wide and do a 1/2" seam allowance. This keeps me from accidently sewing over the metal end pieces.

Check back next week for more gifts! I have to be selective now about what I show since some friends and family are reading, but I think I can give some sneak peeks. And I'm still working on those men's gifts. In the spirit of making things easy this Christmas, I might have to give up on them. A hint and a tip for one of the things I'm trying to do-- do NOT google "beer koozie tutorials" or you will discover that it brings the motherload of virus-laden results. Trust me. Don't do it.

Thursday, December 2, 2010

handmade gifts- day 3

I know I promised my handmade gifts for men, but you'll have to give me an extra day or two. Let's just say my plans are simple in theory, but not so simple when it comes to getting them made. One involves beer and the other involves big magnets. I spent way too much time swearing in my sewing room yesterday trying to figure them out. Hopefully I can do it though, because if I do they should be very cool!

In the meantime, I'll share a gift for one of the guys in my life-- a simple microwaveable heating pad. It measures 12" by 8" and has a divided muslin liner filled with rice. I used denim and a brown herringbone fabric from Joel Dewberry's Modern Meadow line to keep it masculine. I might do a few more of these, because everyone could use some extra warmth every once in awhile! (And I just may have purchased a 25 pound bag of long grain rice at Costco that needs to get used.) I can share my instructions if you're interested, but there are tons of tutorials for these all over the web already as well!


And here's a sneak peek of a couple of other things I'm working on.


There is a table runner there (for us!) and the start of a fun zippered pouch.

Back to it!

Wednesday, December 1, 2010

handmade gifts- day 2

Today, Echino scarves!


A few months back, I ordered some incredible Echino double gauze from Runner Girl Fabric when they had a 30% off coupon. Have you ever felt this stuff??? I am in love with its softness and beautiful colors. I paired the Echino up with shot cottons, and backed each scarf in wool and cashmere suiting that I had in my stash.


How to:

Cut your fabric:

(2) 9" x 21" rectangles double gauze
(1) 9" x 19" rectangle shot cotton
(1) 9" x width of fabric rectangle wool

Sew the two pieces of double gauze to each 9" end of the shot cotton rectangle using a 1/2" seam allowance, making sure that the pattern is oriented correctly on each end. Iron the seams open, and topstitch 1/4" along each side of the seam.


Lay the wool, right side up, on your work table. Lay the pieced double gauze and shot cotton right side down on top of the wool, smoothing well, and pin every few inches along the edges. If the ends don't match up (which they probably won't), even them up with the old rotary cutter. Sew together using a 1/2" seam allowance, leaving a 4" gap along one edge for turning.

Iron to set the seams. Clip the corners, turn right side out, poke out the corners using a knitting needle, and iron the edges flat.

At this point, you can pin the edges again. I chose not to, but did decrease my presser foot pressure from a 7 to a 3 to keep the double gauze from shifting. You could also use a walking foot for this step. Topstitch 1/4" around the edges using a coordinating thread. And done!


The completed scarves are lightweight yet cozy, and decadently soft! The measurements allow for very little waste, as each cut of the double gauze and wools are a straight 1/4 yard. I figured out the cost of each scarf to be around $12, and they took approximately 45 minutes from start to finish.

(Please ignore the horridness of this low light bathroom self portrait--
I forgot to ask Rob to take a photo for me this morning!)
Rob comes from a family of 5 boys (plus a bonus brother who essentially makes it an even 6), plus I have a brother of my own. Tomorrow, I'll be sharing my gifts for the guys!

Tuesday, November 30, 2010

handmade gifts- day 1

Before I start, I should mention that one of my big goals this holiday season is to be able to relax and enjoy my family as much as possible. A good deal of my gift giving will be things that I buy online and have shipped to me (REI and Amazon, I love you!).  Far off family members will get photobooks of the grandkids. But I did find myself wanting to make a few small things for friends and family members to help keep expenses down and give gifts a more personal touch. Everything I've made has so far has come from supplies I already had, and sewn up during an hour here and there.

So first up... lavender sachets!


I purchased my lavender a couple of months ago from Jen's Enchanted Garden on etsy. When the package arrived, the lavender scent was so strong I could smell it before I opened the mailbox! FYI, one pound of lavender buds totally stuffs a gallon-size ziploc bag.


How To:

The construction of these is pretty basic. Cut 4.25" squares from linen and sets of 3 coordinating prints. Sew one square of linen and one print right sides together with a  3/8" seam allowance and tiny stitch length, leaving a 1.5" hole on one side for putting in the lavender. Clip the corners, iron, turn it right side out, and iron again. Insert a funnel and pour in enough lavender to fill up the sachet. (I made a cone out of taped cardstock for pouring in the lavender-- the only funnel I had that was small enough kept getting clogged up.) Then ladder stitch the openings closed. Wah lah!


When I purchased my lavender, it cost me $12.50 plus $5.00 shipping (it's a bit higher now but still very reasonable). I've used less than half of that for 6 sets of sachets. The fabric was from my stash. I've figured the cost of this project to be less than $2 for a set of three sachets. And they come together very fast. Can't beat that!

Next up... Echino scarves! Check back tomorrow!